The aesthetic of your WordPress blog is determined by its themes. Upon your initial visit to your blog, it will appear somewhat like this:
For many, this default appearance may not be particularly attractive.
Tailoring the appearance of your blog stands out as one of the most thrilling and satisfying steps in the process of developing your WordPress blog.
With thousands of pre-designed WordPress themes available, you have the option to choose from both free and premium paid themes.
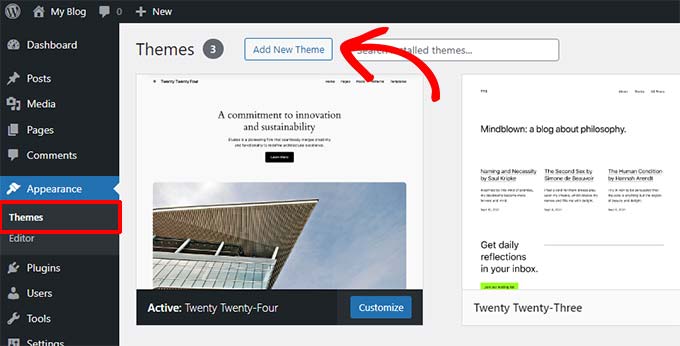
To switch your theme, simply head over to your WordPress dashboard, and navigate through Appearance » Themes.
Proceed by clicking on the “Add New Theme” button.
On the following page, you’ll have the opportunity to search through over 11,000 free WordPress themes found in the official WordPress.org themes directory. Themes can be filtered by categories such as Popular, Latest, and Block Themes, along with other specific features like industry and layout.
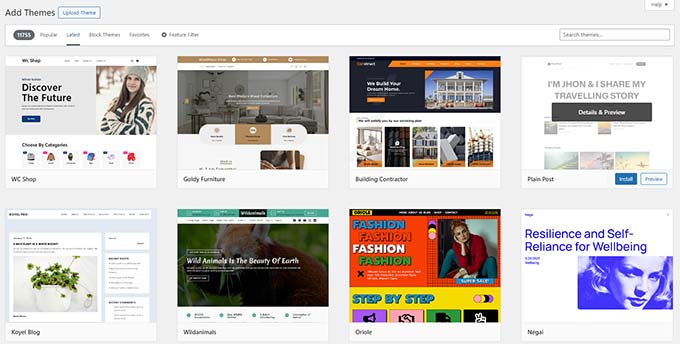
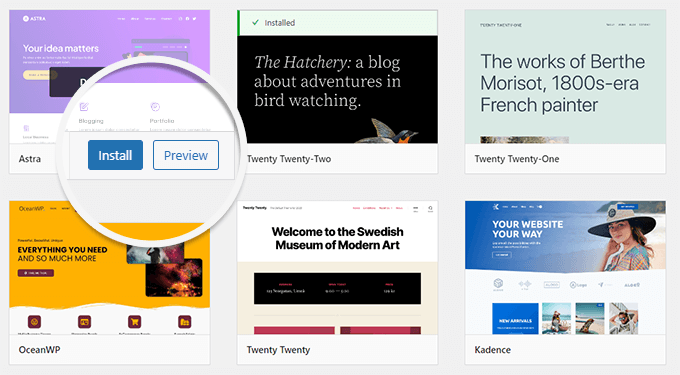
Hovering your cursor over a theme will reveal a “Preview” button.
Clicking this button launches a preview of the theme, allowing you to visualize how the design would appear on your website.
The initial preview of your chosen theme might not mirror the screenshot exactly, which is to be expected. You’ll have the opportunity to customize it further later on.
Focus on the theme’s design, colors, typography, and other visual elements during your selection process. A key piece of advice for choosing the ideal WordPress theme is to prioritize simplicity in design. This approach ensures a clean, clear aesthetic and enhances user experience.
If you’re seeking guidance on picking a theme, consider consulting our guide on essential factors to consider when choosing the perfect WordPress theme.
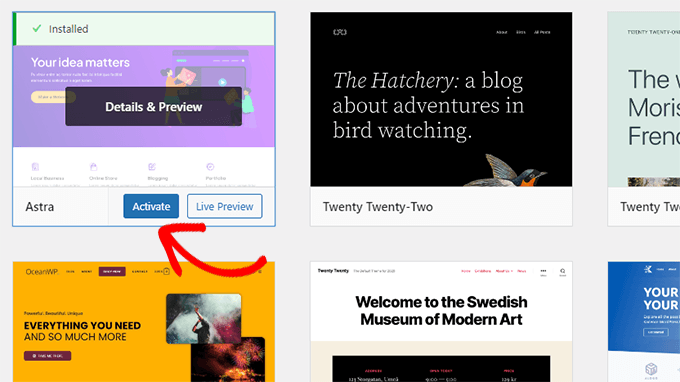
Once you’ve settled on a theme you like, hover your mouse over it to reveal the “Install” button.
Click on this button and await the theme’s installation. Subsequently, the “Install” button will change to an “Activate” button. Clicking this button will activate your chosen theme on your site.
After installing your theme, you can begin customizing it by selecting the “Customize” link found under the Appearance menu.
The customization options available will vary based on the theme you’ve chosen, including built-in widgets and other features to adjust your blog’s design to your preference.

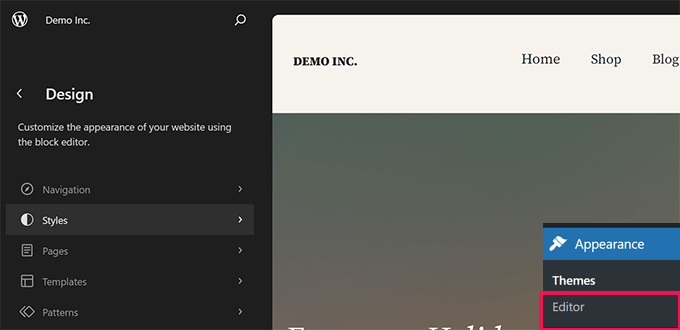
Should the “Customize” link not appear under the Appearance menu, it indicates you’re utilizing a block theme. Block themes leverage the WordPress block editor for theme customization and editing.
To modify a block theme, simply go to Appearance » Editor.
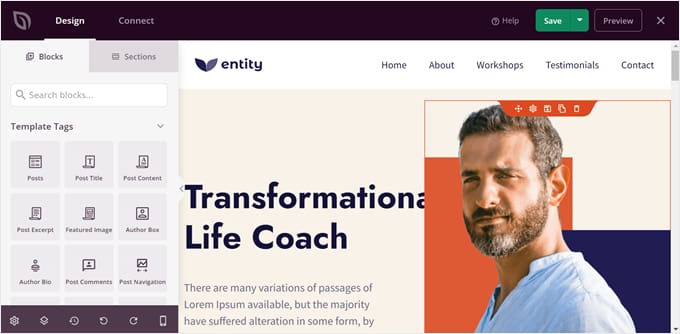
For enhanced design flexibility, consider using a WordPress page builder such as SeedProd or Divi. These tools empower you to craft custom headers, footers, sidebars, and more without the need for HTML coding.
Such plugins offer greater design autonomy compared to platforms like Wix or Squarespace, all while harnessing the comprehensive capabilities of the WordPress content management system.
After choosing your WordPress theme, you’re all set to craft your inaugural blog post.
Install cloudways and get 20% discount for the first month
To learn more head over to the Cloudways website.
You can get started with your own 3 day trial simply by signing up with an email (no credit card required).
Beginner’s Guide Step
- Pick Your Blog Name and Platform (Beginner’s Guide Step 1)
- Install WordPress Blogging Software (Beginner’s Guide Step 2)
- Creating Your First Blog Post (Beginner’s Guide Step 4)
- Plugins & Customizations (Beginner’s Guide Step 5)
- Making Money From Your Blog (Beginner’s Guide Step 6)
- How to Set up Cloudways WordPress Cloud Hosting [Tutorials]